Skip to content

Green Plastic Mesh - Heavy-Duty

$598.83


FREE SHIPPING
SKU LV-GPM-HG-6.7X25
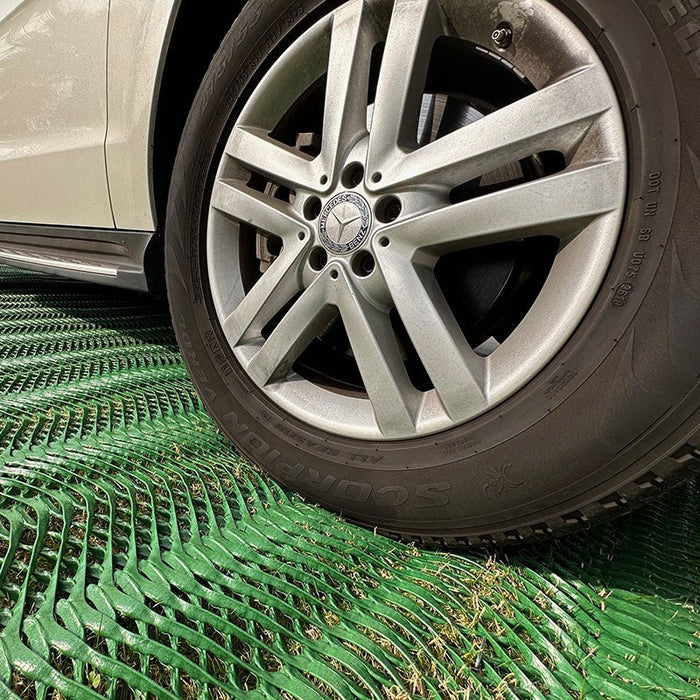
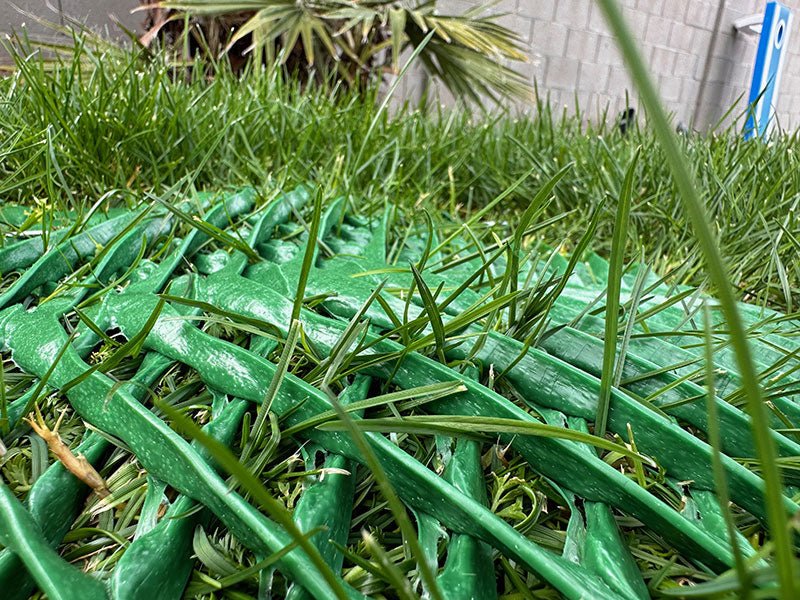
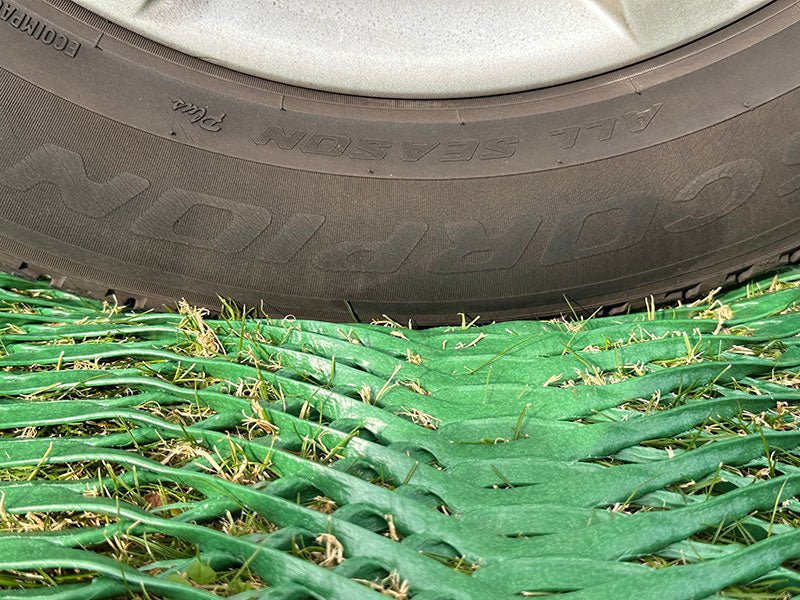
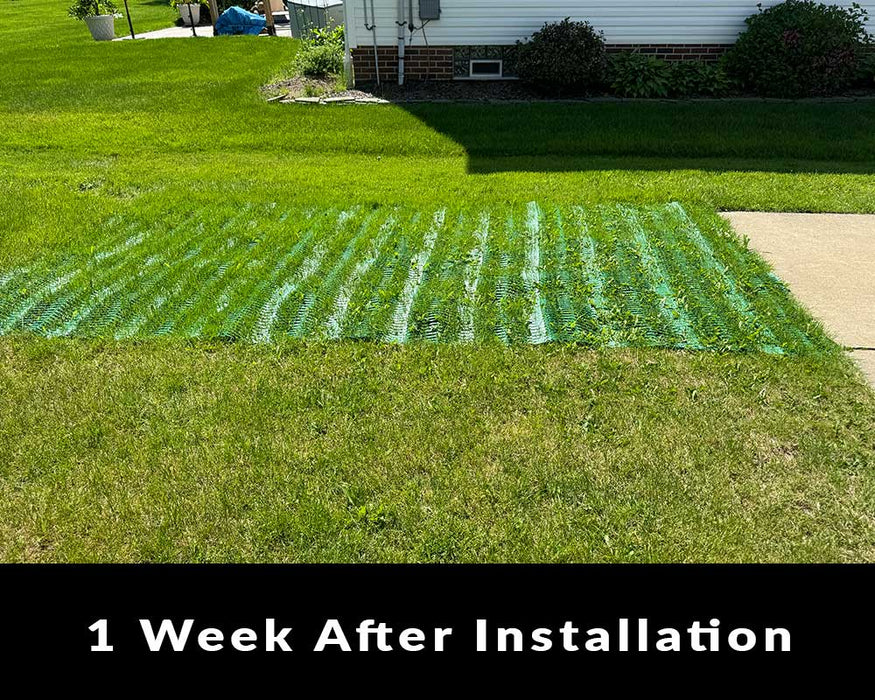
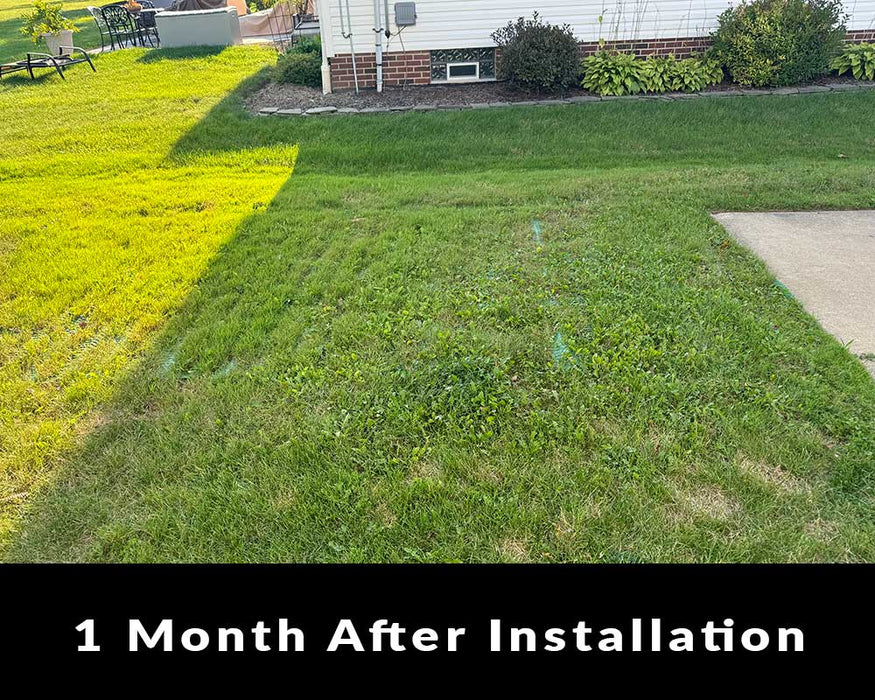
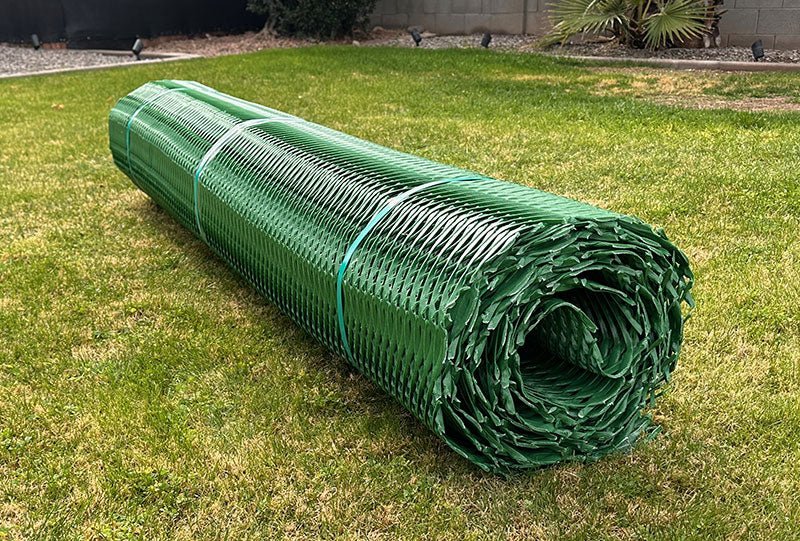
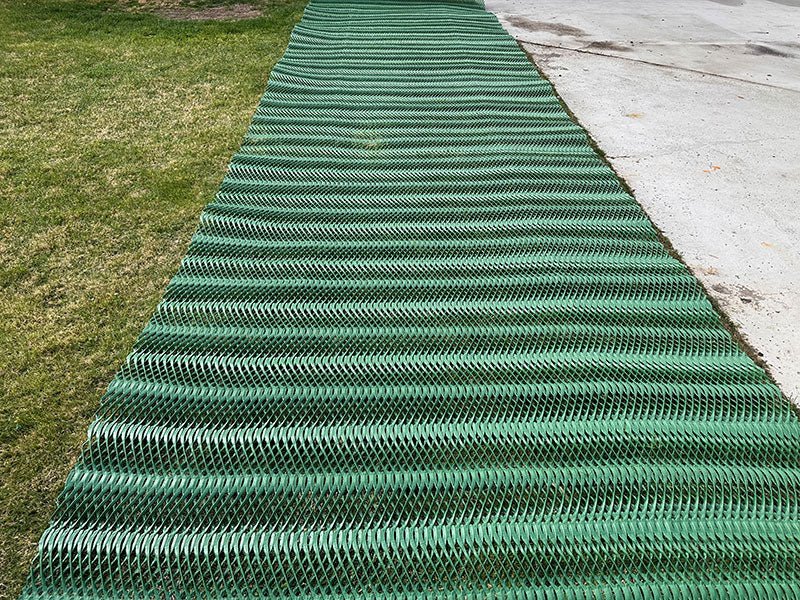
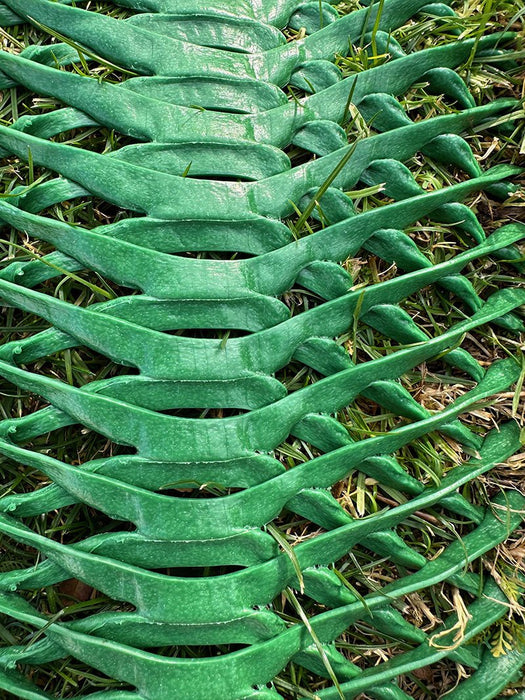
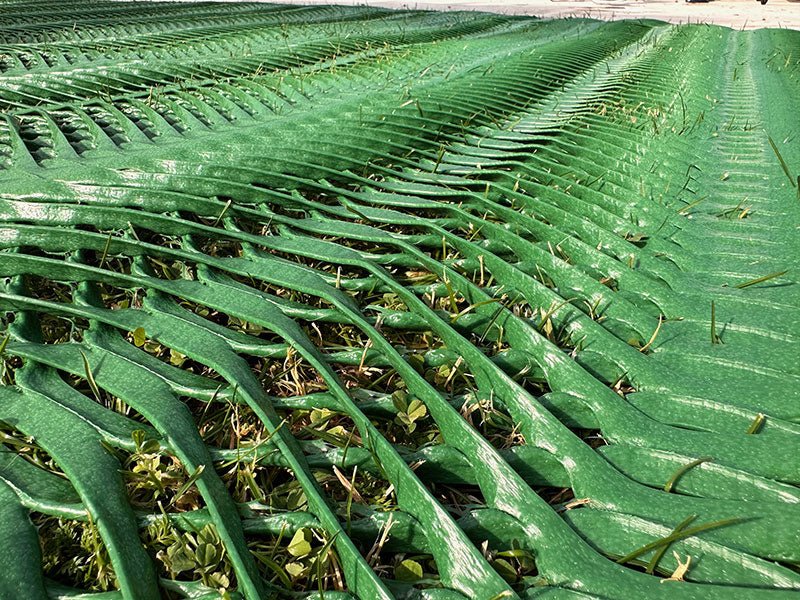
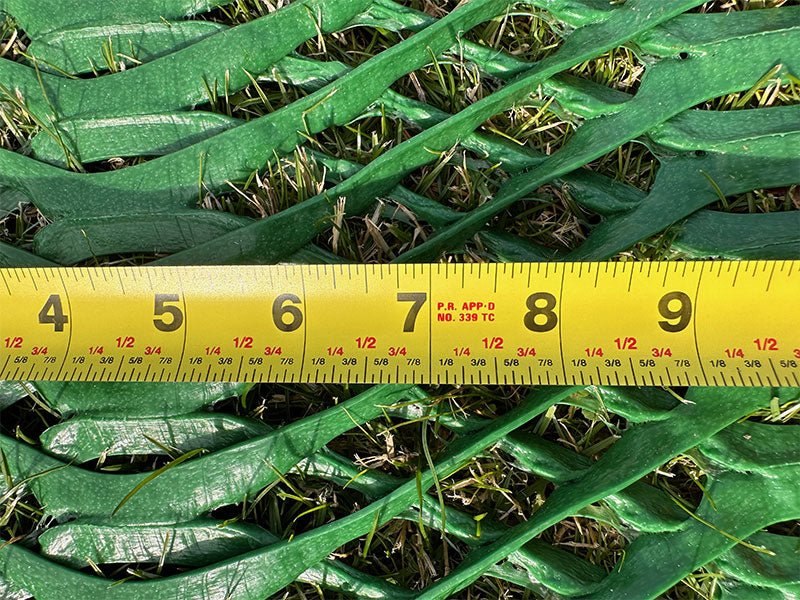
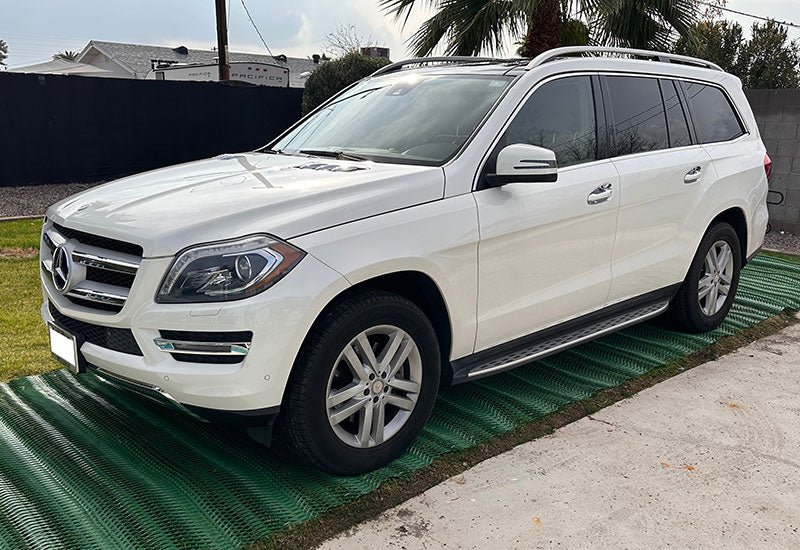
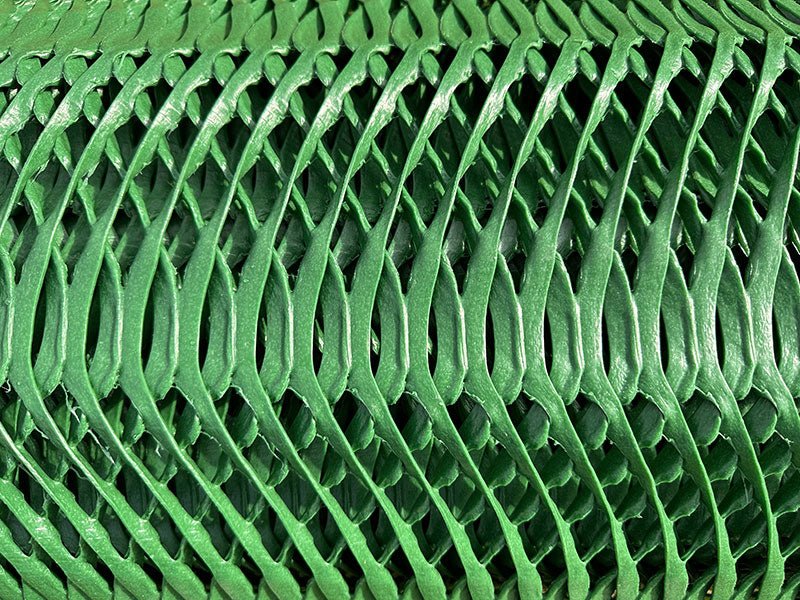
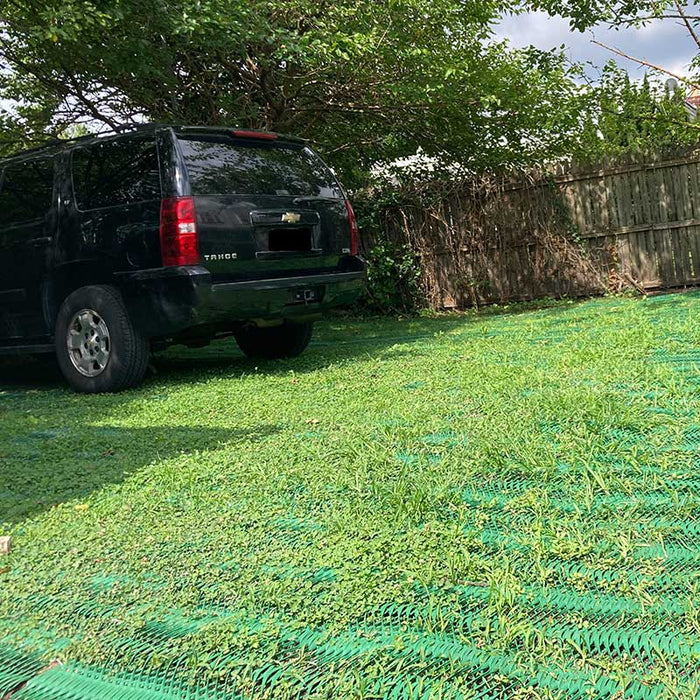
Our Green Plastic Mesh is a premier choice for preserving your green spaces from the constant wear of vehicles and pedestrian activity. This mesh, crafted from superior HDPE material, incorporates a sturdy osculated design that effectively spreads out weight, safeguarding against common ground issues such as depressions, compaction, and damage to grass roots.

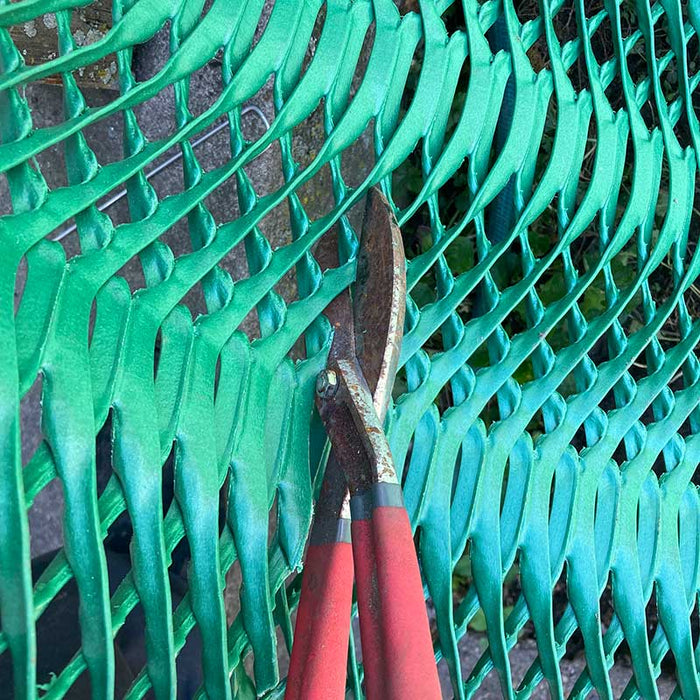
Engineered for resilience, it boasts UV resistance to stand up against the elements, ensuring long-lasting performance. The mesh's inherent flexibility allows for a perfect fit with the natural landscape, facilitating an easy setup while preserving the aesthetic appeal of your outdoor areas.

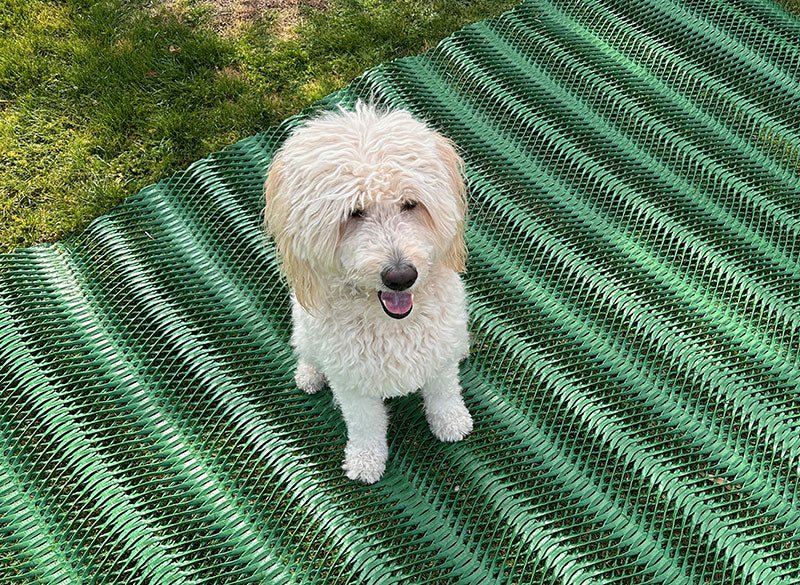
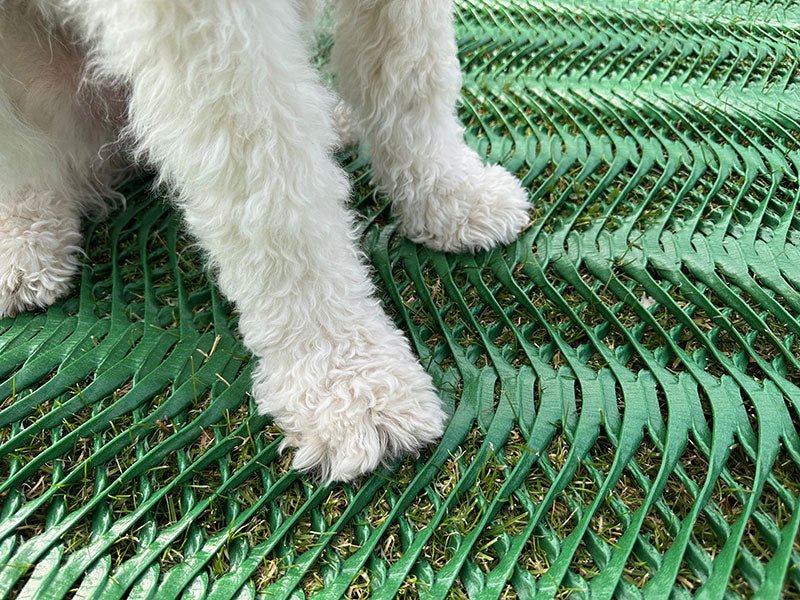
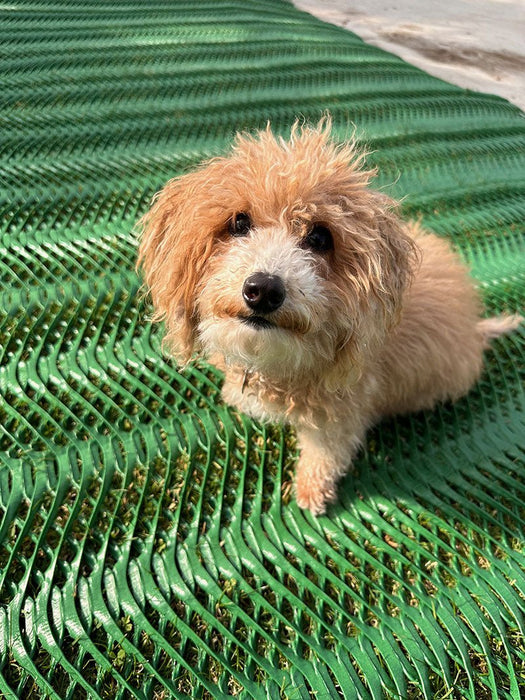
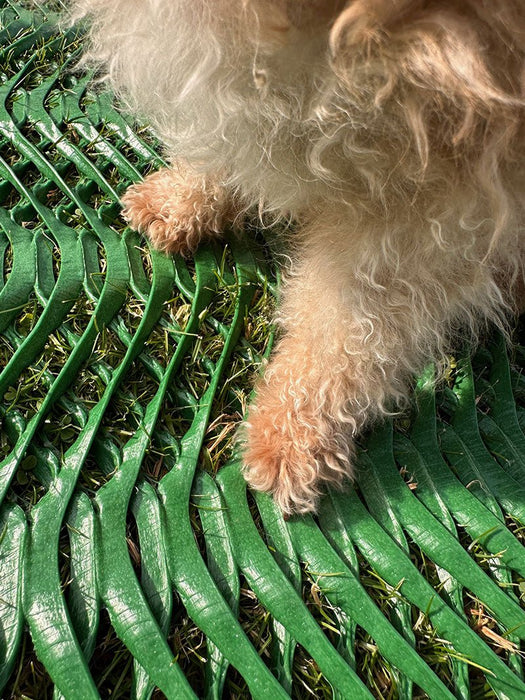
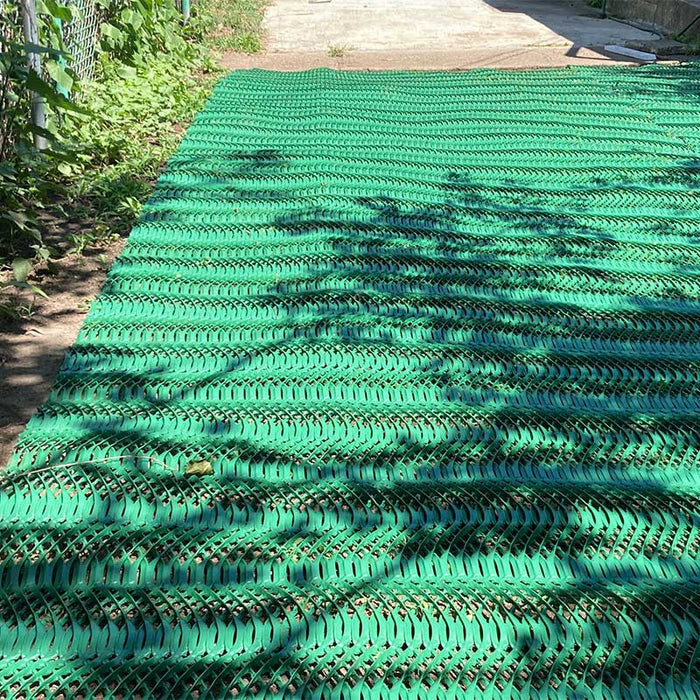
The Green Plastic Mesh is versatile, suited for a range of uses from bolstering commercial parking to creating safe pet zones and walkways. Proudly made in the USA, this mesh marries high quality with environmental responsibility, offering a dependable and eco-friendly option for ground protection.

Opt for the Green Plastic Mesh to keep your lawns vibrant and intact, enabling them to withstand daily traffic without losing their beauty or functionality.

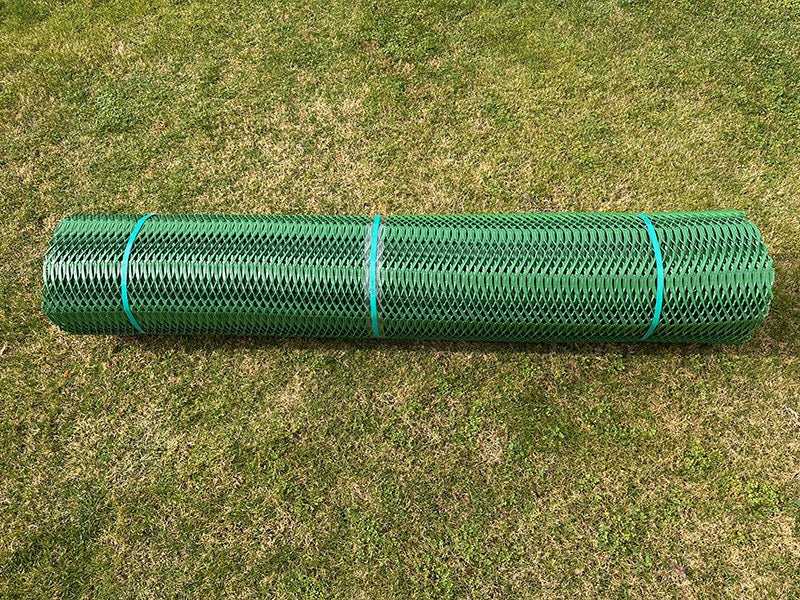
Size: 6.7' x 25' (167.5 SF)
Roll Weight: 60 lbs

MudStop HG™
At a Glance

  • Manufactured in the USA
  • Built-In UV Stabilization
  • Promotes Healthy Grass Growth
  • Reduces Mud
  • Quick Installation
  • Made with Recyclable Materials

MudStop™ HG
Heavy-Grade Grass Protection Mesh

Download Product Specification Sheet
  • Roll Size: 6.7' x 25'
  • Square Feet Per Roll: 167.5
  • Roll Weight: 60 lbs

HG

Heavy-Grade

Our grass protection mesh is designed for demanding applications. The osculated mesh pattern provides a high degree of strength which is required to support the weight of a vehicle. Our mesh is ASTM lab tested to ensure strength and durability.

Request Formal Quote

Do you require a formal quote for MudStop™ HG? Fill out the form at the link below and we will provide you with a written quote within two business days.

Request Formal Quote

Questions?

Do you have product related or purchasing questions? We are happy to help, feel free to contact us.

Ground Staples

Each Roll of MudStop™ HG requires 100 ground staples for proper installation. (sold separately)

Ground Staples - 100 Staple Carton

MudStop™ HG Calculator

How many rolls of MudStop™ HG do you need for your project? Just enter your square footage below:

Easy to Work With 25-foot Roll Size

Most heavy-duty grass protection mesh on the market is shipped in large 50’-70’ rolls which are very large, heavy and difficult to handle. When developing MudStop™ HG we kept this in mind and decided to produce 25’ rolls which are much easier to handle and work with. A roll of MudStop™ HG weighs 60 lbs and can be picked up and moved by one person instead of two. Additionally, due to the reduced roll length, smaller projects can be accomplished without having to purchase a bunch of extra material.

MudStop-roll.jpg__PID:d2eae9a3-ca81-4b0e-96cc-c560816fd8c4
Mudstop-roll-2.jpg__PID:d8c4898c-ebf9-49dc-9a03-afd1179e79b0

"I Love the Heavy Duty Quality"

“Absolutely the best, least costly and less work solution to a turn a grassy area into an extra parking spot. I love the heavy duty quality and the way the green material looks. One $600 roll did the job with no digging/prepping needed. The alternative would’ve been $4300 for cement conversion or $2300 for gravel. The best part of it all: No permits required and can easily be converted back to just grass in the future.”

- Victor, Philadelphia, PA

MudStop™ HG vs Economy-Grade Mesh

Low priced economy-grade mesh can provide basic reinforcement for very occasional vehicular parking. Where issues arise are in material durability and reduced traction. Due to its low strength, economy-grade mesh quickly deforms when driven on and will begin to rut out the grass underneath. Additionally, the low priced mesh is typically a flat mesh without ridges. This can create a slippery surface for pedestrians and vehicles when wet. MudStop™ HG incorporates an osculated mesh pattern to provide greatly enhanced material strength while its multi-layer design enables enhanced traction for both vehicles and pedestrians.

Where Can MudStop™ HG be Installed?

MudStop™ HG grass protection mesh can be installed in a wide variety of different landscape applications - pretty much anywhere you want protection against rutting from tires or foot traffic!

Residential Parking Areas

GPM-1.jpg__PID:bbf8b96c-3c1b-4431-a964-bc47325a9466

Commercial Parking Areas

T5.jpg__PID:3081d8ac-8348-437d-af47-be99e34e1a5b

Vehicle Access Roads

T4.jpg__PID:2818c798-5489-467e-b6c0-ec77b7e1bd9e

Golf Cart & ATV Pathways

T3.jpg__PID:bd9eefc5-91d0-4718-b5fc-064df26f0e70

RV, Trailer or Boat Storage Lanes

T6.jpg__PID:0e701d9f-4b66-46b9-a15d-9528e8622e1e

Overflow Event Parking

T1.jpg__PID:2e1ebe5a-7c61-46c7-8d98-aa7db8505c65

Pedestrian Walkway Areas

T2.jpg__PID:5c65ac6a-dab9-438b-902c-fc159d8bec82
dog-running-on-grass-protection-mesh.jpg__PID:fb43ede6-318c-45eb-860e-708b72a256f8
dog-paws-turf-reinforcement-mesh.jpg__PID:9249befa-2ea2-4d87-80e5-a5ced6e4fb43
dog-grass-protection-mesh.jpg__PID:8f0ae220-49e3-428f-987a-ee58dab8bfca

Great for Dog Runs Too!

In addition to protecting grass from vehicular damage, MudStop™ HG can also be used to protect grass from becoming damaged in dog run areas. The osculated mesh pattern is engineered with small openings which keeps paws from getting stuck. Does your dog love to dig in your lawn? Our mesh will prevent that from happening as well. MudStop™ HG is the perfect solution to keep your lawn mud free and your dog with a safe place to run and play.

3-Step Easy-Installation

The installation of MudStop™ HG in a lawn area can easily be accomplished by the homeowner. Follow the simple 3-step process below to reinforce your lawn with MudStop™ HG for optimal protection of your lawn area:

Step 1:
Cut the Grass Short:

GPM-Step-0.jpg__PID:c001bd93-e694-4775-bc7a-11dbf3fba43d

First cut the grass area short so that the mesh can be applied as close to the root zone as possible. 

Step 2:
Roll out the Mesh:

GPM-Step-1.jpg__PID:a43dd856-61f3-4a1c-8833-35917fd2e62c

Roll out the mesh on the grass’s surface. 

Step 3:
Attach Using Ground Staples:

GPM-Step-2.jpg__PID:e62c99d2-948e-4d8d-b35a-2a68b9d6008a

Using 8" ground staples, affix the mesh to the ground’s surface placing 1 staple every 18 inches in all directions. (each 25' roll of MudStop™ HG requires approximately 100 staples) As a general rule of thumb, the more staples you use the more secure the mesh will be. Edges and seams may require additional staples depending on the installation site characteristics. While stapling, be sure to smooth out any bumps or bubbles in the mesh caused by an uneven grass surface.

You're Done,
Park Your Vehicle!

parked-MudStop-2.jpg__PID:e4972e7b-81aa-4909-bc70-ab4a4d0445b2

You can now drive, park and walk on your reinforced lawn. Be sure to water the grass well to encourage appropriate grass growth through the mesh. This will help disguise the material and provide a more natural looking surface.

Parking an RV or Boat?

If you are parking an rv, boat or other heavy vehicle long-term on the mesh it is a good idea to double up the mesh where the wheels will directly rest. Over time a very heavy load concentrated on a single area can deform the mesh especially during heavy rainfall if the ground below becomes saturated. Adding a second layer of mesh will provide additional support and help to prevent indentation into your lawn from the vehicle tires.The best way to accomplish this is to install a 1-1/2’ square under the main mesh layer where each tire will rest.

How Long Will Shipping Take?

MudStop™ HG is stocked and ships from our Kansas City distribution center. Orders typically ship within one business day. Shipping is free and most customers experience delivery within one week of order placement.

Transit Time

MudStop™ HG orders typically ship within one business day of order placement. Smaller orders of a couple rolls typically ship via UPS / Fedex while larger orders ship by LTL freight. If your order ship via LTL freight the delivery company will contact you prior to delivery to arrange a delivery window that works with your schedule.

shipping-map-c.gif__PID:a1d7b040-17b5-4225-ad55-d824eb952374

Transit times on the map above are shown in business days and exclude weekends and holidays.

How To Install Sod For A Beautiful Yard In Record Time

You can turn your old, tired, dull lawn into a green oasis in very little time by installing sod. You do not have to wait forever to get the results you are looking for. In this article, you will find out how to install sod in your yard and we will give you step-by-step instructions to make it happen. We will show you how to prepare your soil, lay the sod, and how to care for your gorgeous new lawn.

Just What Is Sod?

If you don't know, sod is actually called turf. This is a very popular and effective way to create a lush, healthy lawn. It's made up of mature grass plants that are grown in advance and held together by a layer of sod and roots. It's like some of the work has already been done.

If you want, you can spend up to 24 months growing sod rolls or you can purchase pre-grown plant squares that are created under perfect conditions. When installed the right way, sod will give you an instant lawn that is a huge plus for homeowners wanting a profuse outdoor environment in little to no time.

How To Install Sod

Whether you want to revamp an old, tired lawn or you will be starting from scratch, first and foremost, you must have the right tools to install the sod.

Pallet of Sod

Sod on a Pallet

Must-Have Tools:

Have a shovel or turf cutter to remove the old grass, weeds, and other debris. You'll also need a garden rake to level and smooth the soil. Get a measuring tape to measure the lawn and calculate the amount of sod you are going to need. In order to cut and fit the pieces of sod along the edges and borders of the lawn, you'll need a sharp knife or sod cutter. Use your wheelbarrow to move the sod squares or additional soil.

A garden hose and sprinkler system will be necessary to water the sod. Have a lawn roller on hand to firmly press into the soil to ensure you have good sod-to-soil contact. Fertilizer and added soil might be important depending on the results of your soil tests.

You have to create a guideline to guarantee the edges are straight so make sure you have stakes and plenty of string while laying down the sod. Maintenance is very important for the health and well-being of the new lawn so make sure your lawn mower is up and running properly.

One - Steps For Preparing Your Lawn

It's extremely important to make all your preparations before laying down the sod. Start with clearing out the area of any grass, weeds, and debris using a shovel or turf cutter. The bottom line, you must prepare your area before your sod can prosper and grow. Use a rake to smooth the surface and guarantee there are no low spots. Good preparation will not only give you a level surface but will prevent puddles by offering good drainage.

For Best Results, Have A Soil Test Performed

For a healthy lawn, you should perform a soil test or have someone do it for you. A soil test will give you valuable information regarding the soil's nutrient content, its pH levels, and composition. You can purchase a soil test kit from your local garden center or contact your county office for help. When you understand the soil's unique traits, you will be able to make informed decisions about the soil for improvements and correct fertilization. Understanding the ideal conditions for good root development will lead to better growth. Also, the results from the soil test will help you make changes to the soil by adding organic matter such as compost to improve the soil structure and the nutrient content.

You might think about using a starter fertilizer for new sod. These fertilizers provide essential nutrients like phosphorus which is critical for root development. Good root development will lead to a great beginning for your sod.

Two - It's Time To Measure & Order Your Sod

Now that the preparations on completed, you are ready to order the sod. Decide how much sod you will need by measuring the area in square feet and then order the sod which comes in rolls. Measure the lawn by the length and width of the area you intend to add sod. Multiply both length and width to get the square footage. If you have areas that have irregular shapes, split them up into sections to get better measurements. Take into consideration any waste and order slightly more than you need to cover any irregular shapes so you don't have to cut the sod to fit around obstacles. A good rule of thumb is a 5% to 10% buffer.

Tape Measure on Grass

Tape Measure on Lawn

Choosing The Right Sod

When selecting the sod, make sure you choose the right kind for your climate and what you will be using it for. Your local sod supplier can help you get the sod that's best for you.Be sure to contact a reputable sod supplier or stop by a local nursery to place your order. Give them important instructions such as the date you want the delivery brought to you.

Keep in mind, the freshness of the sod is very important. Therefore, in order to ensure it's fresh, find out when it was harvested. If possible, find out if it was harvested only 24 hours before. The fresher the sod is, the more successful your project will turn out because it will have a higher level of moisture and nutrients.

Three – Schedule Delivery

Make sure you choose a date when you want to start the installation or within 24 hours of delivery to prevent it from drying out. Stay in contact with your supplier to confirm the time and date and make sure they understand your schedule that will meet your delivery requirements. Once your delivery arrives, inspect it right away to ensure it's fresh. Fresh sod will be a vibrant green in color and the soil underneath will be moist. If the sod is dry, yellowish, or damaged, reject any sod that's in that condition.

If you are not able to start the installation right now, store the sod in a shaded area and keep it moist by lightly watering the stacks or rolls. Do Not leave the sod exposed to direct sunlight or wind during the summer months. During the winter months, the sod will last on a pallet for three to five days with constant watering.

Tip – Schedule the delivery of the sod during the morning hours when it's cooler to reduce the risk of it becoming overheated and drying out during delivery.

Laying out Sod

Installing Sod

Four – Start Laying The Sod

Now that your lawn preparations are in order, it's time to start laying the sod for your new lawn. Follow these steps for a successful sod installation. To create a straight edge, start by laying the first row of sod along a straight edge using a driveway or sidewalk. This row will be a good boundary for the rest of the lawn.

Stagger The Seams

To create a stable and nice-looking layout, stagger the seams of each piece of sod in a brick offset pattern. It will enhance the sod's structural soundness and boost the growth of roots.

Fit Pieces Around Objects

Take a sod cutter or sharp blade to trim and shape the sod pieces to fit around trees, flower beds, shrubs, or other objects in your yard. Make sure they fit snugly for a clean look.

Keep The Pieces Snugly In Place

Make sure to place each piece of sod tightly next to the one next to it to ensure there are no gaps. This will ensure a sod-to-soil contact and help the roots develop.

Do Not Stretch The Pieces

Stay away from stretching the pieces to make them fit. It can cause less root contact and leave gaps.

Soil Compaction

After placing down a row or section, take your lawn roller and gently press down on it. It will get rid of air pockets and create a strong connection between the soil and the sod while increasing root growth. After applying each row or section, immediately water thoroughly so it can settle in place while giving moisture to the roots. Continue in rows working a row at a time and overlap the edges just slightly until you have covered the entire area.

Tip – Use stakes and string to maintain a straight line and proper spacing. You will create rows that are well-aligned and even.

Five - Trim The Sod Edges

While installing the sod, it's critical to pay attention to the edges and borders of your lawn. The next step is to trim the sod for a polished clean look. Here's how to accomplish it: Walk around the laid sod and pick up on areas where the sod overhangs or extends beyond the boundaries of your lawn. This is a common occurrence with flower beds, driveways, and sidewalks.

Using a tape measure, mark and measure how much sod must be trimmed. Mark all these areas with stakes or string so you won't be repeating areas and you'll get a great cutting guideline. Carefully cut along the marked lines so you will have a straight and even edge. You should take your time so you do not end up with jagged or uneven edges.

Dispose of the removed trimmings and excessive sod pieces following your area's guidelines. If you have a compost pile, you can add these trimming and pieces there. Continue trimming sod edges as you get through your installation project and pay close attention to irregular shapes or objects. The idea is to create a seamless transition between the sod and any landscaping features.

Rolling Sod Roll

Rolling Out Sod

Six – It's Time To Water The Sod

Now that you have laid down the sod and trimmed it, the next step is applying water to the sod. This phase is critical for the health and vitality of your lawn. Read on to find out what you must do for effective watering: You must immediately water the sod directly after installation. This initial watering must be done directly after installation because it's very important in order for setting the sod in place and removing all air pockets from below.

Do Not Overwater

Completely soak the sod using a garden hose or sprinkler system to guarantee the soil below the sod is moist but not waterlogged. Over the first week, keep the soil constantly moist. Therefore, water lightly several times a day to prevent it from drying out. This is a very important step during days that are very hot and dry. That said, Do Not overwater as it will lead to waterlogged soil and cause root rot. You need a consistent level of moisture without causing water puddles.

Sod in Backyard

Backyard Sod Install

Water In The Morning Hours

The best time to water is in the early morning hours between 6 am and 10 am. These hours will allow the grass to dry before the evening hours which will reduce the problem of disease setting in. Newly installed sod needs 1 to 1.5 inches of water each week. Simply adjust your watering schedule based on the weather. Dry spells might require more watering while rainy conditions can be cut back on.

To check the moisture in the soil, gently lift a corner of the sod and check the moisture in the soil. Over the next few weeks, you can gradually reduce the level of water while the sod establishes its roots. During this time, you can apply fewer watering sessions to entice deep root growth.

Your watering sessions should be reduced to 15 - 20 minutes twice a week.

Pay Attention To Growth

It's important to pay attention to the sod's progression as the roots become established. You can start to apply a standard water schedule.

Tip – Apply 1 – 1.5 inches of water which is equivalent to two 30- to 45-minute sessions each week using an automatic irrigation system. If you will be using a garden hose or sprinkler system, water the lawn for 60 to 90 minutes for each application.

Seven - Reduce Foot Traffic

Even though you might want to check out your hard work, show caution during this phase of establishment. Young grass and tender root systems are sensitive and vulnerable to damage from foot traffic.

Sod needs time to establish a strong root system in the soil. Heavy foot traffic will compact the soil preventing root growth and causing stress to the grass. Grass will become susceptible to diseases and other issues. The soil must be allowed to settle and allow the sod to take root for the long-term health of the lawn. Heavy foot traffic can disturb and cause harm leading to uneven settling.

Tip – You can lay down walkways using boards or stepping stones to bring down the concentration of foot traffic on the grass and distribute the weight more evenly.

Eight – Maintain And Mow The Sod

Your efforts for creating a beautiful lawn do not stop at installation. Good maintenance is critical for your grass to stay healthy and alive.

How To Care For Your New Lawn

You must wait for the right time to mow which is usually around two weeks after installation. Check that your grass has reached the recommended height for mowing your chosen variety of grass. If you will be mowing, it's recommended that you not remove more than one-third of the grass height when mowing.

You might want to leave the grass clippings on your lawn after mowing. These clippings will provide nutrients to the soil and help to retain moisture. Just make sure the clippings are small and will not smother your new grass.

Man Watering Lawn

Watering Lawn

Water And Fertilize The Lawn

Be sure to follow normal maintenance care including fertilizing and weed control as recommended by for your particular kind of grass and your region. Keep an eye out on the soil's moisture and water levels and adjust when needed.

Stay Away From Heavy Foot Traffic

Just like during the installation of the sod, be aware of heavy foot traffic and other activities that could compact the soil or cause stress to the grass, especially during the early stages of establishment. Keep an eye out for issues such as pests, diseases, and other problems on your lawn, and quickly address the problem as quickly as possible to prevent it from spreading and causing more harm.

Why Installing Sod Is A Great Choice

If you want to create a beautiful, vibrant lawn, there are several reasons for installing sod versus other methods. Unlike grass seed which can take weeks to germinate and several months to establish, sod will immediately transform your lawn into something lush and green. Sod will create a consistent appearance free of bald spots resulting in a polished, manicured look from the start. Also, because sod can prevent soil erosion it's perfect for slopes and hilly areas. Sod is a dense and established grass cover that will reduce the need for herbicides and weed control while reducing mud and dust by giving you a clean and enjoyable environment for you and your family. A well-maintained lawn with sod will improve your property's curb appeal and increase the value of your home.

Healthy Grass

Healthy Lawn

When You Should Install Sod On Your Lawn

When you decide to install sod on your lawn it can have a significant impact on its success, it's all in the timing. The perfect time to install sod depends on different factors such as the variety of grass you want to plant, your climate, and what your overall goal is. Please read on to find out when it's the best time to install your sod:

Spring – Between March and May is the best time to install cool-season grasses such as Kentucky bluegrass, Fescue, and perennial Rye grass. The mild temperatures will increase moisture leading to rapid root growth.

Fall – Between September and October is an excellent time for cool-season and warm-season grasses. Also, cooler temperatures will keep down weeds and offer a great environment for sod to become established.

Early Summer – June and July can be a challenge due to the heat and watering needs, but you can successfully install sod if you pay attention to the grass watering needs. Warm-season grasses include St. Augustine, Bermuda, and Zoysia.

Late Fall & Winter - November and December are great for installing sod in mild regions with mild winters during late fall and early winter. Even though the grass will be dormant, it will establish roots during dormancy. This is good for mild-season grasses in mild winters.

Year Round – In regions with mild climates such as the southern region of the United States, you can install sod year-round except during extreme weather conditions including heavy rainfall, extreme heat, or severe cold. These extreme conditions will stress the sod and prevent its establishment.

Tip – You should consult with your local nurseries, sod suppliers, or agricultural services for recommendations based on your region's climate and the variety of grass you want to install.