Skip to content

Grass Protection Mesh for Car Parking

$598.83


FREE SHIPPING
SKU LV-GPM-HG-6.7X25

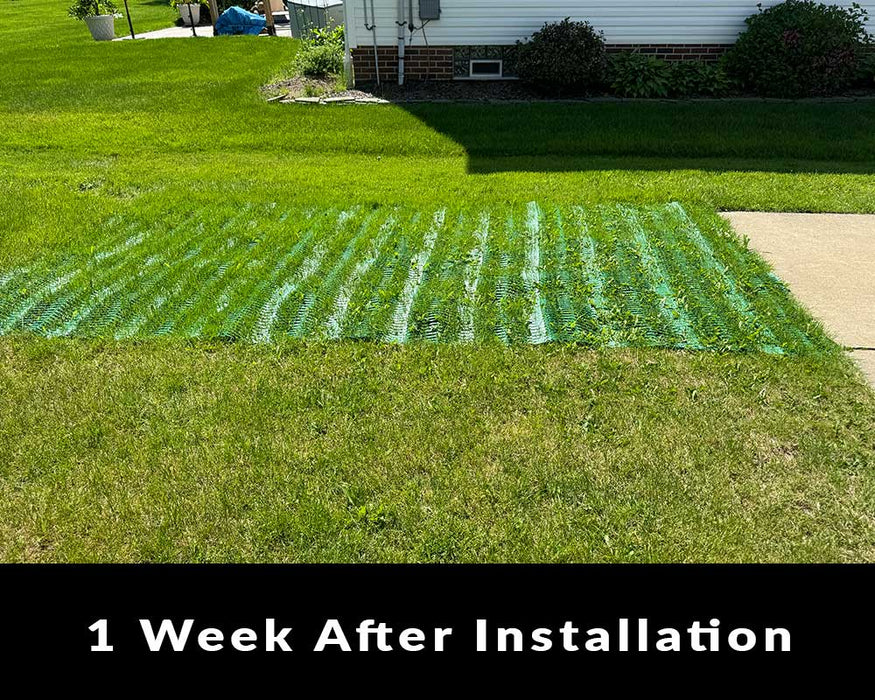
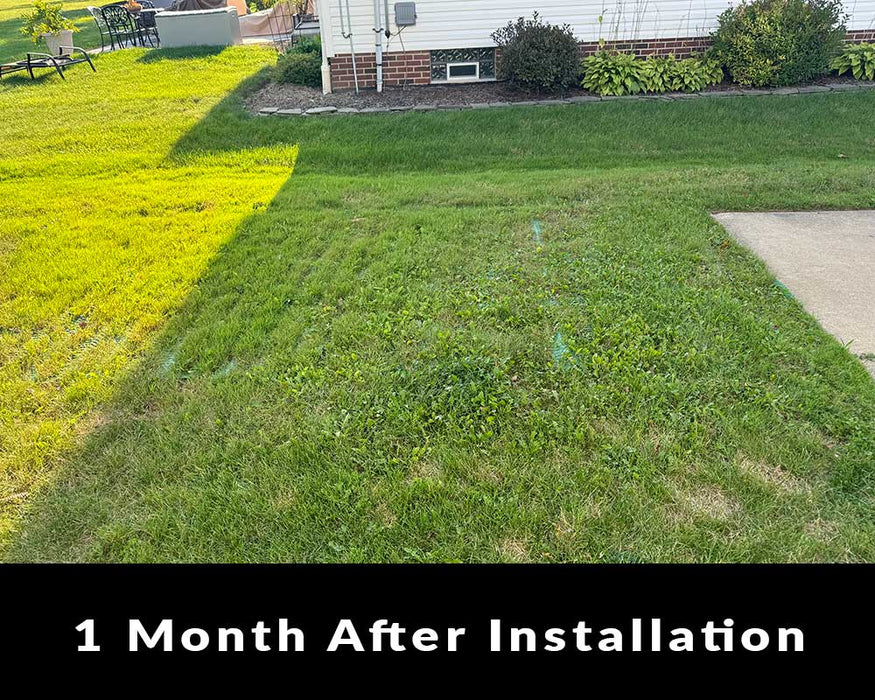
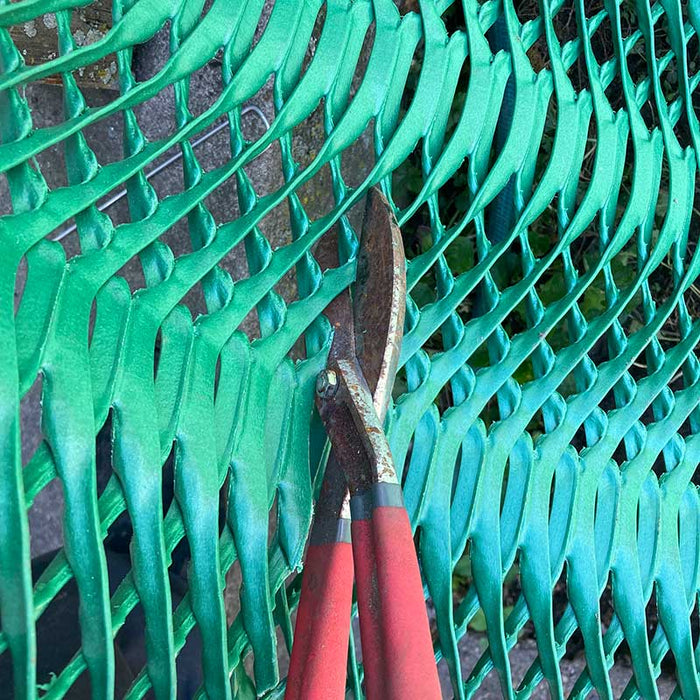
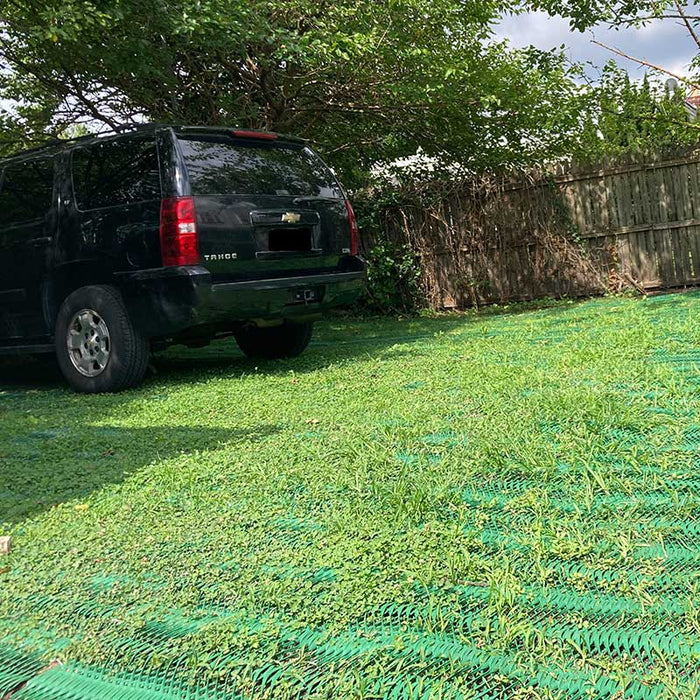
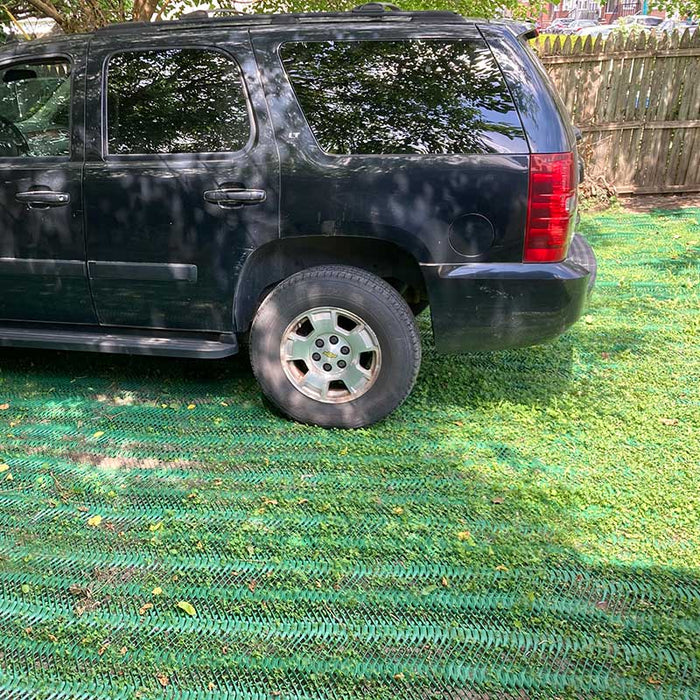
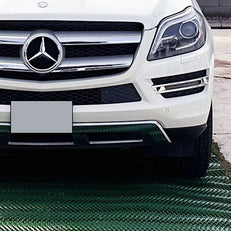
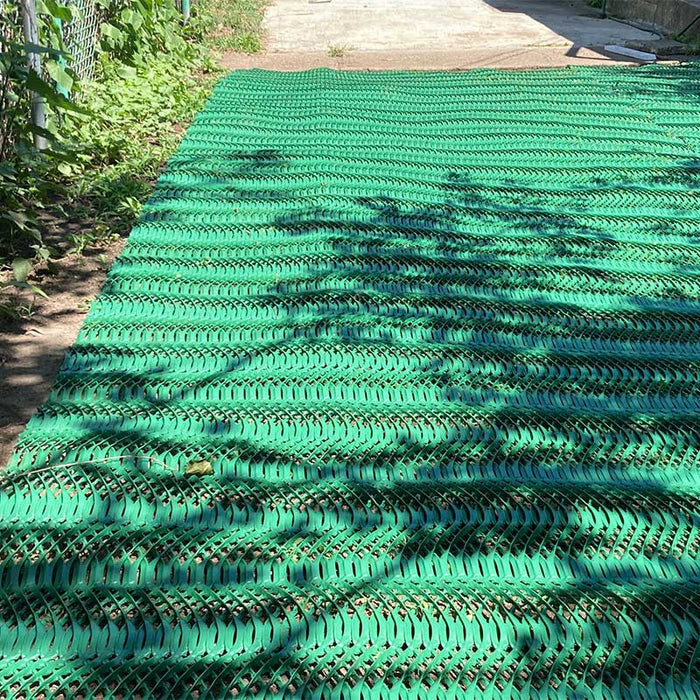
Our Grass Protection Mesh for Car Parking provides grass protection for pedestrian traffic and for daily vehicular traffic and parking. The mesh helps distribute the weight of a vehicle over a wider area which helps to prevent rutting, sinking and grass root damage. This product is manufactured from HDPE, is UV resistant, and conforms to grass areas. The osculated mesh is flexible and can conform to your lawn area while still remaining strong and providing a stable driving surface.

The grass protection mesh for car parking is used in commercial parking areas, RV parking, storage areas, public pedestrian pathways and more. This is a made in America product.

Size: 6.7' x 25' (167.5 SF)
Roll Weight: 60 lbs

MudStop HG™
At a Glance

  • Manufactured in the USA
  • Built-In UV Stabilization
  • Promotes Healthy Grass Growth
  • Reduces Mud
  • Quick Installation
  • Made with Recyclable Materials

MudStop™ HG
Heavy-Grade Grass Protection Mesh

Download Product Specification Sheet
  • Roll Size: 6.7' x 25'
  • Square Feet Per Roll: 167.5
  • Roll Weight: 60 lbs
HG

Heavy-Grade

Our grass protection mesh is designed for demanding applications. The osculated mesh pattern provides a high degree of strength which is required to support the weight of a vehicle. Our mesh is ASTM lab tested to ensure strength and durability.

Request Formal Quote

Do you require a formal quote for MudStop™ HG? Fill out the form at the link below and we will provide you with a written quote within two business days.

Request Formal Quote

Questions?

Do you have product related or purchasing questions? We are happy to help, feel free to contact us.

Ground Staples

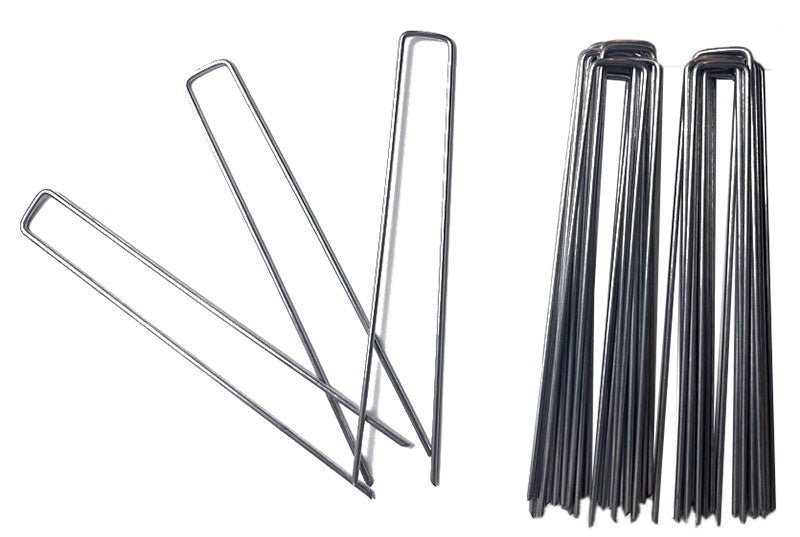
Each Roll of MudStop™ HG requires 100 ground staples for proper installation. (sold separately)

Ground Staples - 100 Staple Carton

MudStop™ HG Calculator

How many rolls of MudStop™ HG do you need for your project? Just enter your square footage below:

"I Love the Heavy Duty Quality"

“Absolutely the best, least costly and less work solution to a turn a grassy area into an extra parking spot. I love the heavy duty quality and the way the green material looks. One $600 roll did the job with no digging/prepping needed. The alternative would’ve been $4300 for cement conversion or $2300 for gravel. The best part of it all: No permits required and can easily be converted back to just grass in the future.”

- Victor, Philadelphia, PA

Easy to Work With 25-foot Roll Size

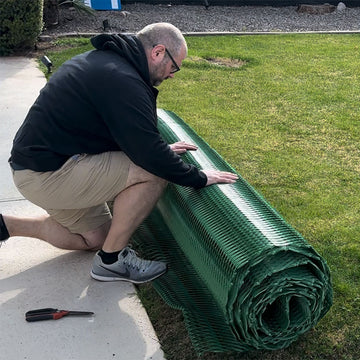
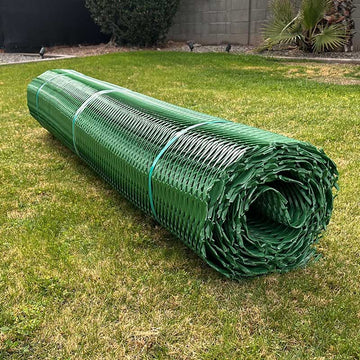
Most heavy-duty grass protection mesh on the market is shipped in large 50’-70’ rolls which are very large, heavy and difficult to handle. When developing MudStop™ HG we kept this in mind and decided to produce 25’ rolls which are much easier to handle and work with. A roll of MudStop™ HG weighs 60 lbs and can be picked up and moved by one person instead of two. Additionally, due to the reduced roll length, smaller projects can be accomplished without having to purchase a bunch of extra material.

MudStop-roll.jpg__PID:d2eae9a3-ca81-4b0e-96cc-c560816fd8c4
Mudstop-roll-2.jpg__PID:d8c4898c-ebf9-49dc-9a03-afd1179e79b0

MudStop™ HG vs Economy-Grade Mesh

Low priced economy-grade mesh can provide basic reinforcement for very occasional vehicular parking. Where issues arise are in material durability and reduced traction. Due to its low strength, economy-grade mesh quickly deforms when driven on and will begin to rut out the grass underneath. Additionally, the low priced mesh is typically a flat mesh without ridges. This can create a slippery surface for pedestrians and vehicles when wet. MudStop™ HG incorporates an osculated mesh pattern to provide greatly enhanced material strength while its multi-layer design enables enhanced traction for both vehicles and pedestrians.

Where Can MudStop™ HG be Installed?

MudStop™ HG grass protection mesh can be installed in a wide variety of different landscape applications - pretty much anywhere you want protection against rutting from tires or foot traffic!

Residential Parking Areas

GPM-1.jpg__PID:bbf8b96c-3c1b-4431-a964-bc47325a9466

Commercial Parking Areas

T5.jpg__PID:3081d8ac-8348-437d-af47-be99e34e1a5b

Vehicle Access Roads

T4.jpg__PID:2818c798-5489-467e-b6c0-ec77b7e1bd9e

Golf Cart & ATV Pathways

T3.jpg__PID:bd9eefc5-91d0-4718-b5fc-064df26f0e70

RV, Trailer or Boat Storage Lanes

T6.jpg__PID:0e701d9f-4b66-46b9-a15d-9528e8622e1e

Overflow Event Parking

T1.jpg__PID:2e1ebe5a-7c61-46c7-8d98-aa7db8505c65

Pedestrian Walkway Areas

T2.jpg__PID:5c65ac6a-dab9-438b-902c-fc159d8bec82
dog-running-on-grass-protection-mesh.jpg__PID:fb43ede6-318c-45eb-860e-708b72a256f8
dog-paws-turf-reinforcement-mesh.jpg__PID:9249befa-2ea2-4d87-80e5-a5ced6e4fb43
dog-grass-protection-mesh.jpg__PID:8f0ae220-49e3-428f-987a-ee58dab8bfca

Great for Dog Runs Too!

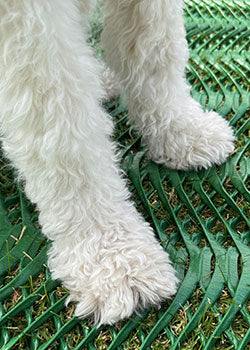
In addition to protecting grass from vehicular damage, MudStop™ HG can also be used to protect grass from becoming damaged in dog run areas. The osculated mesh pattern is engineered with small openings which keeps paws from getting stuck. Does your dog love to dig in your lawn? Our mesh will prevent that from happening as well. MudStop™ HG is the perfect solution to keep your lawn mud free and your dog with a safe place to run and play.

3-Step Easy-Installation

The installation of MudStop™ HG in a lawn area can easily be accomplished by the homeowner. Follow the simple 3-step process below to reinforce your lawn with MudStop™ HG for optimal protection of your lawn area:

Step 1:
Cut the Grass Short:

GPM-Step-0.jpg__PID:c001bd93-e694-4775-bc7a-11dbf3fba43d

First cut the grass area short so that the mesh can be applied as close to the root zone as possible. 

Step 2:
Roll out the Mesh:

GPM-Step-1.jpg__PID:a43dd856-61f3-4a1c-8833-35917fd2e62c

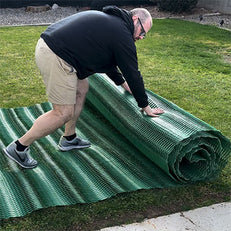
Roll out the mesh on the grass’s surface. 

Step 3:
Attach Using Ground Staples:

GPM-Step-2.jpg__PID:e62c99d2-948e-4d8d-b35a-2a68b9d6008a

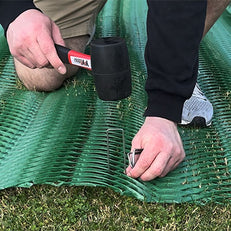
Using 8" ground staples, affix the mesh to the ground’s surface placing 1 staple every 18 inches in all directions. (each 25' roll of MudStop™ HG requires approximately 100 staples) As a general rule of thumb, the more staples you use the more secure the mesh will be. Edges and seams may require additional staples depending on the installation site characteristics. While stapling, be sure to smooth out any bumps or bubbles in the mesh caused by an uneven grass surface.

You're Done,
Park Your Vehicle!

parked-MudStop-2.jpg__PID:e4972e7b-81aa-4909-bc70-ab4a4d0445b2

You can now drive, park and walk on your reinforced lawn. Be sure to water the grass well to encourage appropriate grass growth through the mesh. This will help disguise the material and provide a more natural looking surface.

Parking an RV or Boat?

If you are parking an rv, boat or other heavy vehicle long-term on the mesh it is a good idea to double up the mesh where the wheels will directly rest. Over time a very heavy load concentrated on a single area can deform the mesh especially during heavy rainfall if the ground below becomes saturated. Adding a second layer of mesh will provide additional support and help to prevent indentation into your lawn from the vehicle tires.The best way to accomplish this is to install a 1-1/2’ square under the main mesh layer where each tire will rest.

How Long Will Shipping Take?

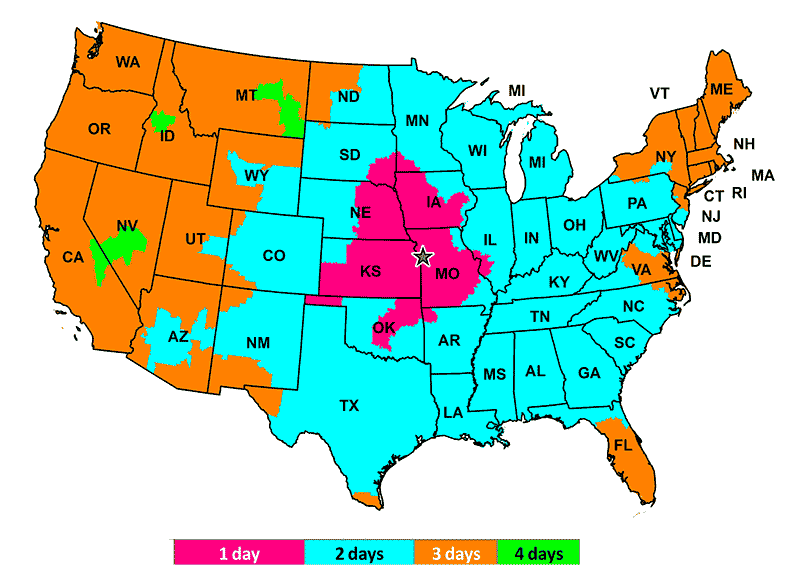
MudStop™ HG is stocked and ships from our Kansas City distribution center. Orders typically ship within one business day. Shipping is free and most customers experience delivery within one week of order placement.

Transit Time

MudStop™ HG orders typically ship within one business day of order placement. Smaller orders of a couple rolls typically ship via UPS / Fedex while larger orders ship by LTL freight. If your order ship via LTL freight the delivery company will contact you prior to delivery to arrange a delivery window that works with your schedule.

shipping-map-c.gif__PID:a1d7b040-17b5-4225-ad55-d824eb952374

Transit times on the map above are shown in business days and exclude weekends and holidays.

Installing a New Lawn - Overview

Installing a new lawn can be time-consuming and somewhat stressful. First and foremost, you must lay down new sod whether you are doing this yourself or hiring someone to do it for you. Either option, it's a good idea to know how to lay down sod to ensure it's done properly.

We will go over all the steps so you get it right the first time. So, let's get started:

Sod ready for installation

Grass Sod on Pallets

One – Test The Soil

We highly recommend you test the soil before applying chemicals to kill off the old grass and before installing new sod. The health of the soil will determine the future health of your new grass. You literally have to work from the ground up to create excellent grass quality. You need to balance the soil's pH so when you add nutrients from the fertilizer your grass will be able to absorb them. If your soil's pH is out of balance, the nutrients cannot be absorbed properly leading to a waste of your time and money.

You should take a soil sample and send it off to a lab. This is an affordable test that takes approximately 2 weeks to process, depending on the lab. Keep in mind, before installing the soil, make sure you have enough time to get the results back to know what your soil needs.

Step One should be completely done before applying a non-selective herbicide that we'll go over in Step Four. Once applied, the chemicals in the herbicide may temporarily alter the soil's pH before going back to normal. Make sure you have the soil test before applying the non-selective herbicide for a more accurate reading.

Two – Choose The Kind Of Grass For Installation

Selecting the grass for your lawn can be a lot of fun but do not choose it solely for its aesthetic appeal. You must choose a grass that will thrive in your climate and environment. For instance, if you have a lot of shade, choose a grass that is tolerant to shade. Also, find out how much maintenance is required for different kinds of grass. Here are some things you should take into consideration before selecting your grass:

- Know the climate and area you are living in.
- Brush up on the different grass characteristics.
- Study the visual differences between grass textures and colors along with their physical features.

Three – Measure The Planting Area

This will help you find out how much sod you are going to need for the project.

Four - Kill & Remove The Old Grass

Before you can start your new grass, you have to remove the old grass, any vegetation, and debris from the area reserved for the new sod. This should only be done after you have the soil test. Killing the old grass will make it much easier to remove.

Selective Herbicide vs Non-Selective Herbicide

A selective herbicide only works on weeds listed on the label. A non-selective herbicide will kill all vegetation it comes in contact with. Therefore, be very careful not to get it on your shrubs, trees, or in your garden. For the purpose of laying down new grass, make sure you get a non-selective herbicide to kill off everything including your old grass and existing weeds so they cannot invade the new sod.

- If you will be removing old grass, you should follow these instructions:

- Make an application of non-selective herbicide or another glyphosate-based product at least 10 -14 days before the grass sod will be installed.

- Wait 3-4 days and then make another application if the grass is not dying off fast enough.

- Once the grass is dead, use a sod cutter or a rototiller to removethe top layer of grass and debris.

Rolling Out Grass Sod

Rolling Out Sod

Be sure to follow the instructions on the label of your glyphosate product. If you do not have a sod cutter or rototiller, you can rent this equipment through your hardware store. Home Depot has a great rental service.

Five – Prepare The Soil

If you prepare the right way, it will make it easier for roots to penetrate more evenly and deeper. Deep roots will make your lawn more dense and will resist drought. In turn, this will save on water and nutrients. Also, a dense lawn will prevent weeds as well as insects and diseases.

The steps for prepping & leveling your soil -

- Use a rake or hoe to curtail compacted soil.
- Pull up or add organic matter.
- Smooth out your soil's surface to see how level your yard is.
- Use a sprinkler system or wait for rain to settle the soil a bit.
- Smooth the soil's surface one more time.
- Moisten the planting area's surface before laying sod.

Six – Lay Out & Roll Out The New Sod

Once the preparation is completed, it's time to have the sod delivered and installed. Keep in mind, the grass should be off the pallet and in the yard within 48 hours or less.

Finishing Up Grass Install

Rolling out Grass

Tips For Laying Out The New Sod

Decide where you want the sod delivered and placed for your convenience. Use a wheelbarrow or wagon to move slabs where you are working now or where you will be tomorrow.
Place the slabs in temporary shady spots where you are working and keep them from drying out. Consider different piles of slabs throughout the yard so they will be closer to where you are working.
Consider having some people on hand to help out with labor. The average-sized yard should have a team of 3 people. You should have the tools you will need such as a utility knife or a box cutter to cut odd shapes for landscaping or curbs.

Use a brick pattern when working with off-setting seams. To cut around corners and edges, use a landscaping edger or machete.

Place the pieces together as tightly as possible to prevent weeds from pushing through the seams and keep moisture in. Once installed, the grass should be rolled smoothly.

Seven – Water & Fertilize

It's important to make sure the sod is watered thoroughly. Soak the area after the sod is laid as the grass needs water to keep from drying out. The edges of sod are also prone to drying out. Sod laid around the edges of sidewalks, driveways, or along edgings is likely to dry out but make sure you do not overwater these areas. Ask your local landscaping facility to help you know the right amount of water to apply vs overwatering. Overwatering can cause diseases to grow in the new sod.

Choose a fertilizer that has the necessary nutrients your soil will need according to the initial soil test results. Also, your new sod will require plenty of phosphorus which helps roots grow so the new sod can become established.

Eight - Car Parking

If the intended use is for car parking, consider reinforcing the surface with grass protection mesh. This material will help to disperse a car tire’s downward pressure. The end result is a more stable surface and greatly reduced rutting.

In Conclusion

If you are planning on having new grass in your yard, knowing how to install new sod is critical to the success of your yard's excellent appearance. These suggestions can help you get there whether you plan on doing this yourself or if you prefer to have a contractor install the lawn for you.

Finished New Lawn

New Lawn in Yard